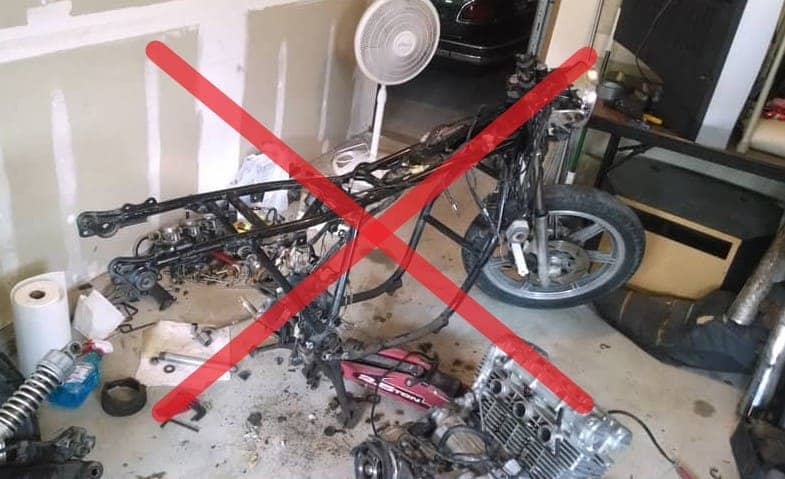
The first few motorcycles I restored I thought that in order to do a thorough job I needed to pull the engine completely out and completely disassemble every piece of the motorcycle.
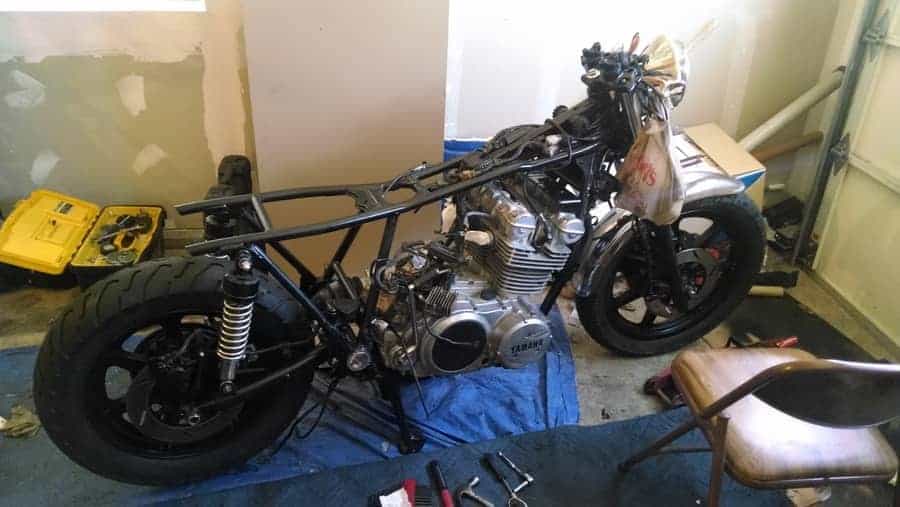
Looking back that was a mistake. For a daily driver motorcycle it is completely acceptable to leave the engine in place and most of the motorcycle assembled to get a good paint job on the frame.
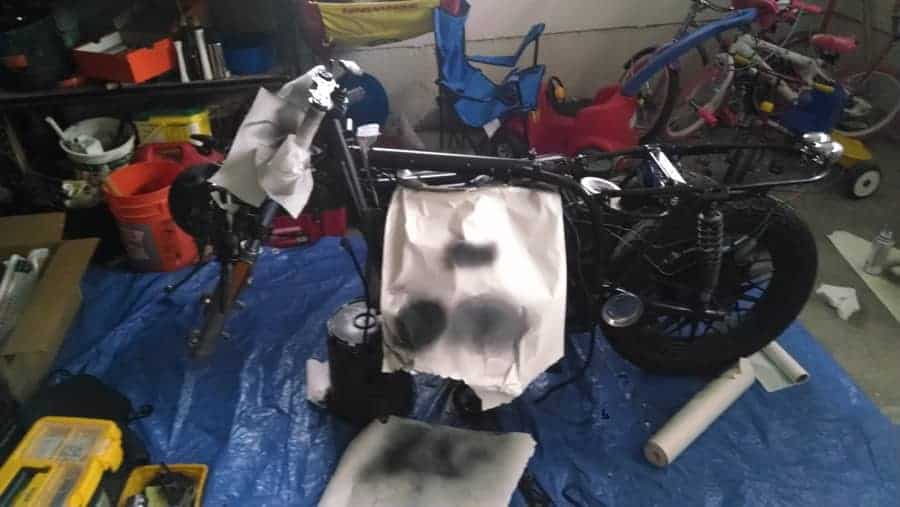
So how do you paint a motorcycle frame without removing the engine? Carefully tape off all aluminum engine parts, bolt heads, and anything you don’t want over spray on. Sand all the rough spots on the frame, wipe the whole frame off with wax and grease remover, then carefully spray light coats of primer and paint on the frame.
I always paint my motorcycle frames black because I like the look. Black is really easy to do since almost all frames came black originally, so blending is simple.
This is a simple job and can be done by someone with little painting experience. Don’t be stressed out by messing up, but at the same time be careful and take your time.
Finishing your motorcycle as quickly as possible should not be the goal. Take it a little slower than you had planned and make sure you do the job right the first time, because if you get over spray on the engine it will be nearly impossible to get it off.
Preparation
The most important part of any painting job is the preparation. I’ll walk you through the steps of how to prep correctly so your frame looks great for decades to come.
1. Take off the gas tank. Every tank is different, so make sure you know where all the tank bolts are located. There is usually one large bolt located between the base of the tank and the very front of the seat. Some tanks have multiple bolts, but a lot of them only have this one bolt.
Once the bolt is out, slowly wiggle the front of the tank back and forth and slide it off the rubber mounts that are attached to the frame. Don’t pull it up hard, it should come fairly easily. I’ve pulled too hard several times and it gives suddenly and smacks into the handlebar clamp and puts a dent or scratches on the tank.
Don’t scratch up the tank taking it off the frame, you’ll just be making more work for yourself in the long run.
2. Remove the instrument cluster, handlebars, oil tank (if it has one), headlight, and other parts that you’re going to be replacing throughout the build.
Getting as much stuff out of the way now will help with making the paint job easier. If you plan on just painting a very small part of your frame that is pretty accessible then don’t worry about this, keep everything on.
3. Use a wire brush/sandpaper/scraper to take off chunks of dirt, mud, grease, etc. Get all the big stuff off of the frame. There will undoubtedly be years or even decades of built up grease and grime. It all needs to be cleaned off completely before you paint.
Don’t cut corners on the preparation. Take off the front and rear wheels of the motorcycle and balance it. Taking off the wheels really opens up some hard to reach places, like around the rear swing arm, the underside of the rear section of frame (where a lot of rock chips happen over the years), the front forks, etc.
Let me insert a safety note here. Anytime you’re doing sanding on these old motorcycle frames or tanks make sure you have a respirator, not a cheap dust mask from the hardware store, an actual respirator. A lot of these foreign motorcycles had high amounts of lead and other harmful chemicals in the paint, so protect yourself first. Your health is worth more than anything.
4. Use a heavy grit sandpaper to sand any rust spots on the frame. If there is any rust at all and you paint over it, the rust will continue to grow and spread underneath the new coat of paint.
Sand all the way to the metal, and even through a small layer of the metal if you need to, just make sure absolutely no rust is left. You can use either use 80 grit sandpaper and sand by hand, a wire wheel attachment on a drill works well, or a sanding/grinding disc on an angle grinder. If the metal has rusted all the way through the frame you need to get a new patch welded in place.
Don’t leave holes in the frame, it’s dangerous and irresponsible. I can’t stress the point enough to get all the rust fixed! Once the rust is taken care of, sand the metal with 150 grit sandpaper to smooth out the metal a bit more, then sand with 300 grit as a final metal prep before priming.
5. If there are large sections of the frame that don’t have imperfections and just need a brighter coat of paint then just use 300 grit sandpaper or a scotch-brite pad to scuff up the surface of the paint.
All paint has to be scuffed before trying to adhere new primer or paint or else the new chemicals won’t adhere properly, after a while it will flake and chip off, exposing old sections of paint. Many people think the frame needs to all be completely sanded down to bare metal in order to get a good coat of paint to stick which is not true. You need a good smooth base, it doesn’t matter whether that base is bare metal or painted.
6. Once all the grease deposits, rust spots, and imperfections on the previous paint have been cleaned and sanded away, pour some wax and grease remover on a lint free cloth and wipe the entire frame several times. The first few times you wipe the frame your rag should turn black.
If it doesn’t turn black at first then you probably have a crappy grease remover that isn’t doing anything. Wipe it very thoroughly several times and get all specs of old sanded paint off the frame. After you wipe it several times your rag should start coming up clean. Once you’re not getting any more residual dust then you know the frame is ready for primer.
Remember, after you’ve rubbed the whole frame with wax and grease remover don’t touch any of the metal with your bare hands. Your hands have natural oils on them which can bubble the paint and cause problems.
7. Using masking tape and newspaper, mask off all bolt heads, engine brackets, all shiny parts, wiring harnesses, and the entire engine block. Overspray will go everywhere when you paint the frame, so cover everything on the motorcycle that you don’t want to be black.

Again, don’t cut corners and try to save time doing important jobs. Do it correctly the first time so you won’t have to do it again for a long time.
Priming
After the metal prep is finished, priming is the next mandatory step. Primer acts as a chemical bonding agent between the bare metal and paint. Without it, the paint will not adhere correctly to the metal and the life of your paint job will be drastically decreased. See the primer I recommend in my list of recommended motorcycle upgrades.
The entire frame does not need to be primed, only spots that have been sanded down to bare metal. I recommend using the green self-etching Dupli-Color primer from any of your local auto parts stores.
Self-etching primer and epoxy primer are different products and have different uses. Whenever you sand anything down to bare metal you will want to use self-etching primer, not epoxy primer.
The self-etching primer is a chemical mixture of phosphoric acid and zinc (and a few other bits). What I understand is that the phosphoric acid forces the zinc into contact with the bare metal which helps inhibit rust growth, which is why there can’t be any finger smudges or oils on the frame before you prime. Those oils will get between the bare metal and primer and cause problems.
Before you begin priming, make sure all the taping and masking that you previously did is still sticking in place. Overspray from the primer will float all over everything, so make sure everything is covered or it will get primer overspray and dust all over it.
Again, make sure you’re wearing your mask when you start priming, the vapors are terrible for your lungs.
As you prime the bare metal spots, only do a very light coat for your first coat. The first coat isn’t going to cover much at all and you’ll still be able to see the metal color shining through. If you cover the whole spot completely in green then you have sprayed way too much. Three light coats is much better than one heavy coat. Let the coats dry for 10 minutes between layers.
If you spray too much and get a run then stop spraying and let it sit for 30 minutes. Don’t try to wipe it off, that will make a bigger mess and more work for yourself. Let it dry in place and then sand it after it has hardened.
Sand the run with 150 grit sandpaper and then with 300 grit to smooth it out. Wipe that spot again with wax and grease remover, make sure the frame is dry and then re-prime.
Painting
After you let the last coat of primer dry for 20-30 minutes the frame should be ready for paint. The primer should be dry to the touch without any wet spots. If there are still wet spots then wait another 30 minutes. Follow the directions on the back of the paint can in order to get the best results.
I like to use Dupli-color semi-gloss or gloss black paint from any of the local auto parts stores or online for my frames. Click here to see the Dupli-color spray I use for all my frames in my list of recommended motorcycle upgrades. I really like Dupli-color because their spray nozzles are really good quality and they stay clean.
Cheap cans have bad nozzles and they shoot paint spatter, which is extremely frustrating after you’ve just spent hours prepping the frame and then you have to sand the spatter off and paint it again.
Paint the whole frame in 2-3 light coats. Again as a reminder, the first coat of paint should not cover everything up. You should still be able to see green primer through the first coat of paint. Spray lightly to make sure you don’t get any runs and wait 10-15 minutes between coats.

The entire priming and painting process should be pretty quick and only take a couple hours because of wait time between coats. The real beast of this project is prep time. Good Prep = Good Paint Job.
Right after you spray your last coat of paint and before it dries, remove all the tape and masking that you covered everything with. As you peel the tape back it is less likely to pull up sections of paint if the paint is still a little wet. Wait several hours for the paint to fully dry before trying to reinstall any parts.
If you don’t like the look of your front forks you can also paint those as well during this whole process since the front wheel is already off. I did this on quite a few of my motorcycles and thought it gave the old grey front forks a breath of life.
Follow the same preparation steps to paint the forks as you did the frame.
Many people ask me why I paint my frames instead of powder coating them. In order to powder coat a frame correctly you have to take literally everything off of it, including the greased bearings in the triple clamp which are a pain to take out and put back in.
Powder coating a frame is usually several hundred dollars as well, and I’m trying to teach you how to rebuild a motorcycle on a budget. Painting is faster, cheaper, and if done correctly looks as good as any powder coat job. Powder coating is more durable, but the time and work necessary to do it correctly isn’t worth it to me.
And powder coating a frame isn’t something you can do at home either, you need an industrial sized oven to fit it in.
I have created an entire videos series about how to restore a motorcycle from start to finish. Within this series includes in-depth tutorials on how to paint a motorcycle frame without removing the engine to make the bike look brand new. Also included in the series are restoration tips and tricks you won’t find anywhere else online as well as other hard to tackle components such as carb rebuilds and electrical. Click here for more information if you’re interested in restoring or building your dream motorcycle!
Related Questions
Can I paint or powder coat my wheels? You can either paint or powder coat your motorcycle wheels. There are pros and cons to both depending on your budget and what type of look you want. See my pros and cons list here discussing painting vs. powder coating motorcycle wheels.
What are the best places to store registration on a motorcycle?
- Under the seat
- In a side bag
- Inside a magnetic stash box
- Inside your helmet
- Inside your jacket
- Inside a key chain accessory
- Behind the license plate
- In an attached canister
- Inside your phone case
Click here to see our article and learn more about how to store important paperwork on your motorcycle with limited space.
