Cafe racers are becoming a more and more popular these days. The old vintage look it has along with it’s simplicity is pleasing to any pair of eyes that see it. If you’re thinking about turning your motorcycle into a cafe racer, you’ve absolutely come to the right place.
I’ve restored 18 motorcycles over the past few years and I turned every single one of them into cafe racers. As a professional engineer that constantly pursues mechanical hobbies, I am confident when I say I know motorcycles and I know how to build a cafe racer. Whether you’ve built a cafe racer before or this is your first attempt, this guide will help you through everything you’ll need to know to make that cafe racer dream of yours come true.
I should also mention that I have created an entire video series about rebuilding a motorcycle from start to finish. Click here for more information if you’re interested in the video version!
A Brief History Behind The Cafe Racer
First, let’s discuss what a cafe racer is, where it came from, and what it was used for. I’m sure you know the basics since you’ve already expressed interest in the idea, right? But understanding what a cafe racer is is essential if you wish to build one. You may look at someone else’s and think “Oh, I want to have that!” But you’ll need to first understand how they’re built and what alterations need to be done to get to that sleek look.
Cafe racers originally came to fruition in Britain during the post WWII era. Motorcycles were more common on the streets and were also becoming more affordable. The younger generation became interested in the hobby, but only able to afford the most basic models of motorcycles. These basic models were then transformed into the style we know now today as cafe racers.
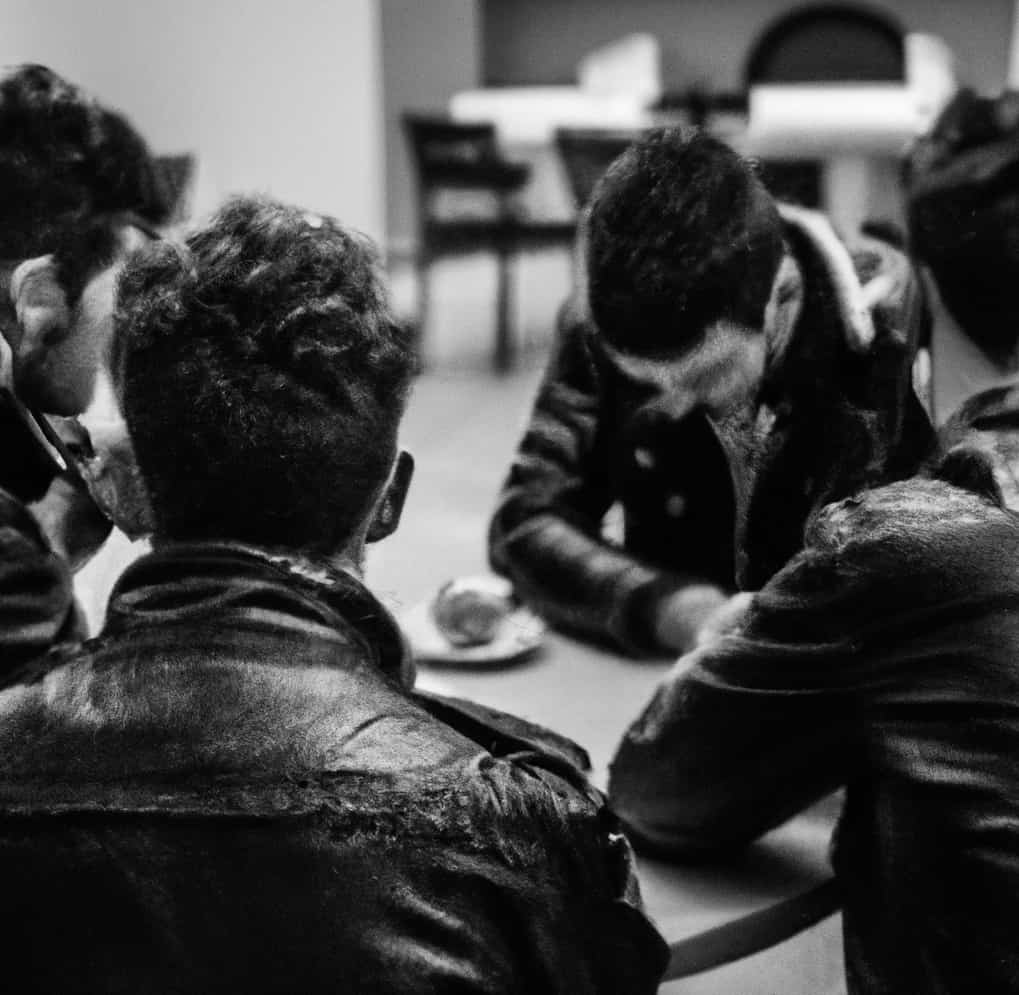
These youngster were often found with their motorcycles in groups at cafes. They quickly adopted the “Grease” look and looked for cafes that played American rock and roll music which usually meant “truck stop” cafes. Other groups of motorcyclists would zoom past the cafes (seeing a group of motorcycles parked outside of it), which essentially meant they were “challenging” the group inside to a race.
Ultimately, these groups would race each other from cafe to cafe, thus bringing to life the term “cafe racer.” Over time, these motorcyclists would alter their bike to be fast and efficient which is where the minimalist look came from.
The Looks That Make A Cafe Racer
If you wish to make a cafe racer, there are a few rules you’ll need to abide by in order to get your bike classified as such. These are all the rules I applied to my 18 cafe racer builds and saw great success. People went insane over my bikes and I guarantee they’ll do the same for yours with these rules.
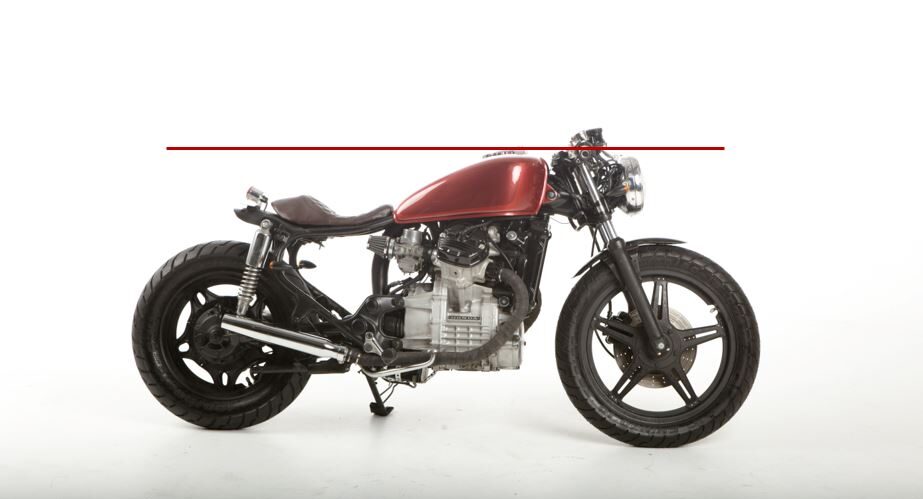
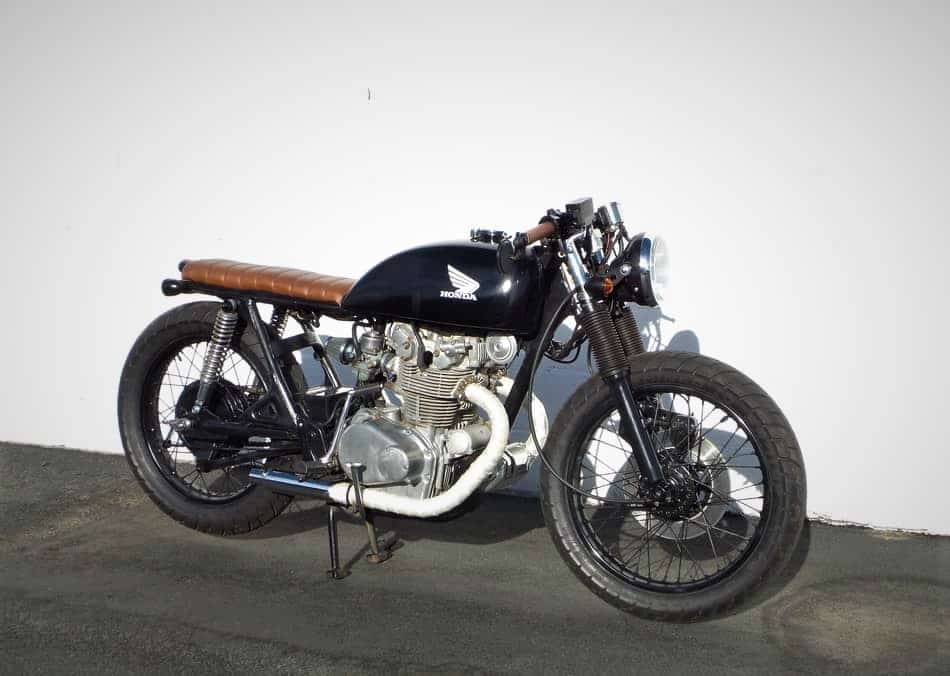
First and foremost, a cafe racer is extremely minimalist and low-profile. This means that nothing should go much higher than the motorcycle gas tank.
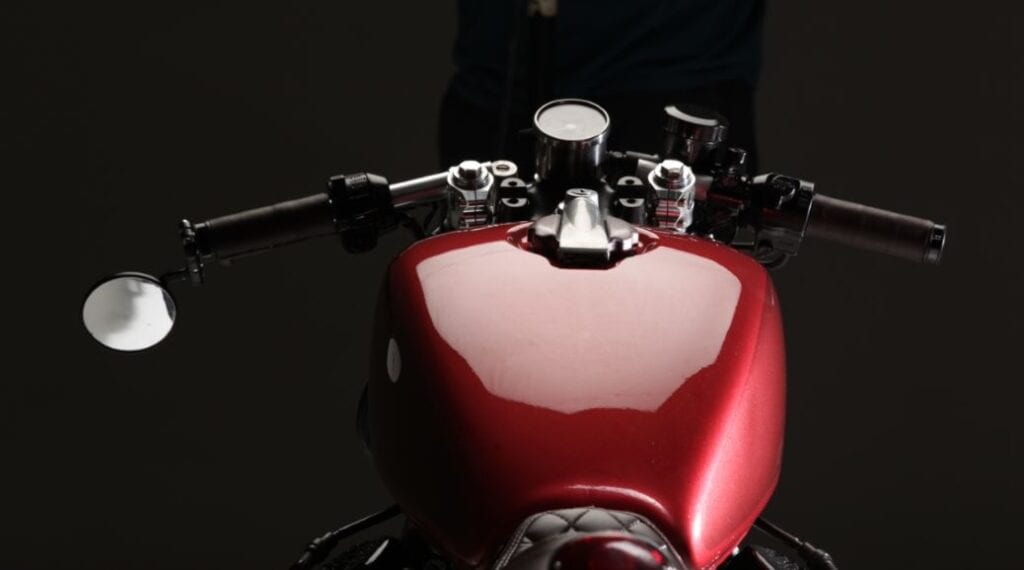
In order for nothing to go much higher than the gas tank, you’ll need low profile handlebars. Clip-ons or clubmans should do the trick.
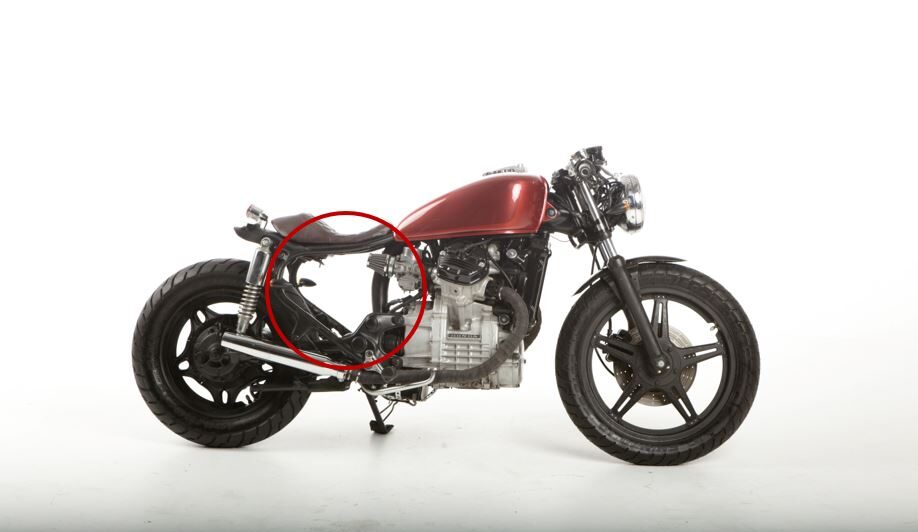
Next, you’ll need to try to hide that battery as much as possible. My goal with my cafe racers is to always get this “hole” clear under the seat. It really goes a long way to get that cafe racer look. You can hide the battery by either laying it on its side or mounting it right under the seat. I have a full article about how to hide a motorcycle battery, you can see that by clicking here.
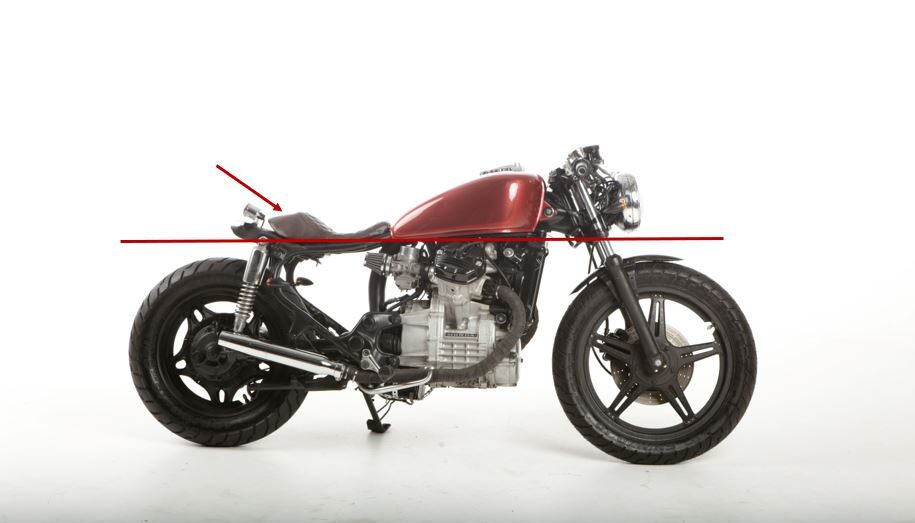
Having a cafe racer means the seat needs to be in line with or almost in line with the bottom of the motorcycle gas tank. The seat should also have a rear hump on it or be completely flat.
A good amount of effort should be put in to hiding the wiring. There are several creative ways of doing this, one of my personal favorites being attaching them between frame rails underneath the seat. You can learn more ways to hide the wiring by reading my other article here.
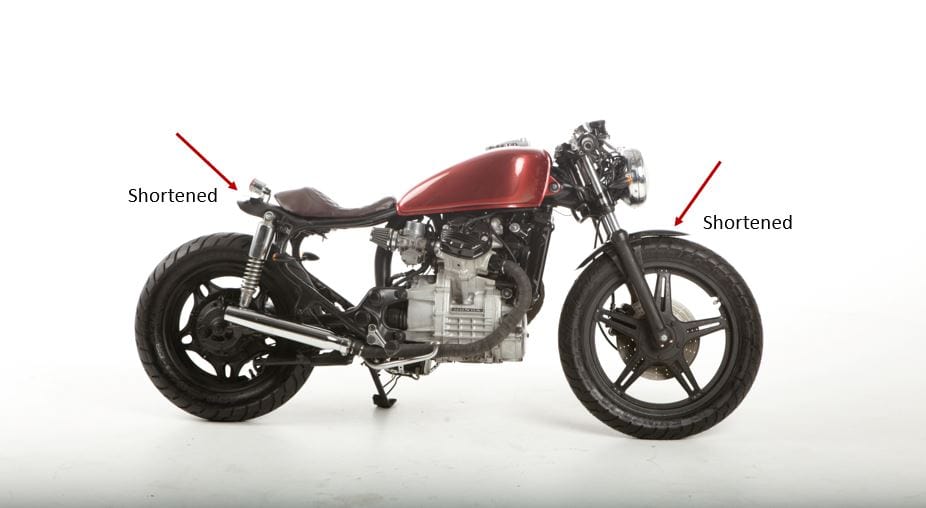
Next, let’s talk about the fenders. These will usually require some alterations. What is normally done for cafe racers is shortening the front fender and just completely removing the rear fender. I’ve had a lot of success just grinding the front fender to the size I want. Be sure to check with your local laws about fenders on your motorcycle since some states and areas require them for registration.
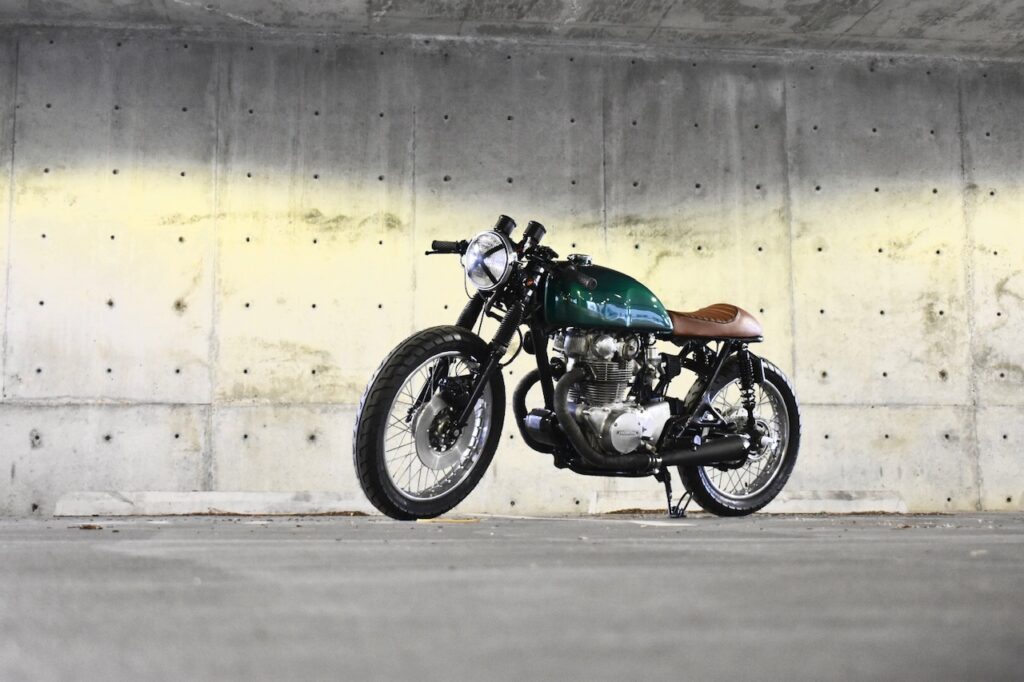
Bonus: This isn’t necessarily needed for making a cafe racer motorcycle, but it certainly adds a classy look. Taping an “x” on the headlight is a common practice among cafe racer owners because of the history behind it. Oftentimes when those greasers would race from cafe to cafe, they would tape an “x” with electrical tape on the headlight to help with damage control in case the light broke. It was a practice adapted from racecar drivers who did the same thing at the time.
Before You Start
There are a few things you’ll want to think about before you start restoring/making your cafe racer. First, you’ll need to figure out where you’re going to work before you start on any kind of motorcycle project. Try to find a place that you don’t mind keeping a little messy for the next few months; rebuilding a motorcycle isn’t exactly the cleanest job.
Second, make sure you have the right tools for the job. It’s important to use quality tools while you’re working on your cafe racer build. I’m not saying you have to go out there and have the most expensive and best tools offered; just don’t buy the cheapest stuff there is. Click here to see the list of tools I recommend and constantly use myself while working on my cafe racer builds.
Rebuilding and modifying a motorcycle takes a lot of time and you must be willing to sacrifice some of your evenings and weekends to get the project done. Budget your time wisely. Have an open discussion with household members and your significant other about the time you’ll be spending on your motorcycle.
Stick to the time you’ve discussed out of respect to the other household members you live with as well as your partner. This can cause a lot of contention if you don’t and it’s not worth the stress you bring upon yourself if your time isn’t used wisely. My first few cafe racer builds were purely a hobby (before I made it an official business) and the time I spent on it caused some contention with my wife. I’ve learned now how to schedule that time out wisely.
Lastly, assess your finances and make sure you are able to sufficiently fund your cafe racer build (see my article here about the detailed cost). Make a plan, know how much you’re going to spend, and stick with it. It helps to go through each system and parts of your motorcycle that you’ll need to replace and plan accordingly. Always add in a few extra hundred dollars into your budget because surprises will come.
Find Your Motorcycle

Okay, so it’s time for the nitty gritty stuff……actually getting to build your cafe racer! Now is the time to find the motorcycle you’ll be working on. This is one of the most enjoyable and exciting parts about the process of building a cafe racer. If you don’t already have a motorcycle to rebuild, now is the time to go out and find one. Click here to see what I always look for when buying a project bike.
I recommend restoring something that was made between the 70’s and 90’s. These types of motorcycles tend to be a lot easier to restore and convert into cafe racers because of their simplicity and basic systems. They’re also a lot cheaper to buy compared to newer motorcycles.
If this is your first restoration, I recommend restoring a Japanese motorcycle (such as Yamaha or Honda) because they tend to be the easiest type of bike to rebuild.
If you have more experience, go ahead and branch out a little further. European motorcycles make beautiful cafe racers, but be warned that they are much more complicated than other bikes; they are more expensive, use random threads (some have neither metric nor english), and the parts are more difficult to find. I found this out the hard way with my 1969 TR25W Triumph. It turned out beautiful, but man was the work on that so much more difficult because of the weird tools I needed!
Keep in mind that a lot of used motorcycles won’t come with the original owner’s manual. Having one specific to your motorcycle will greatly help during this process so if you don’t have one, I highly recommend using emanualonline.com. It’s an easy and affordable tool to access your motorcycle’s manual quickly.
Strip Your Motorcycle
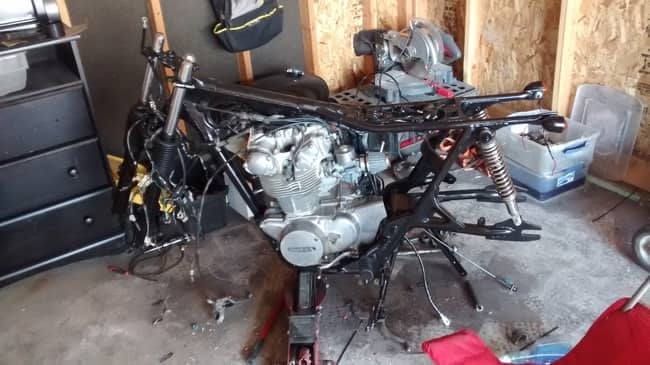
Once you have purchased your motorcycle and brought it home into your work space, now is the time to strip it completely down except for the engine (I find that engine removal is unnecessary, some are thorough and remove it anyway). In my experience, I have found that the motorcycle looks so much better when you strip it, clean it, repaint, and put everything back on. It’ll feel and look like a brand new motorcycle.
Always remember to take hundreds of pictures while you are disassembling your motorcycle. This is something you absolutely cannot forget! You may take off a part and think you’ll remember where it goes, but when you’re putting it back on a few weeks or months later, you will have no idea where it goes. Take pictures before you take anything off, it saves so much time and frustration in the end.
Label every wire you see. Take a few minutes to identify where each wire connects and what it does. It helps to keep them connected and test them out to make sure you know what their job is. Wrap some tape around it with a detailed description about the wire. Never cut wires before you know what they do.
You need to put every single bolt you take off the motorcycle into a labeled plastic baggie. Again, you may think you’ll remember where each bolt goes, but you’ll soon find that your motorcycle has a lot of bolts and you will never remember which ones goes exactly where.
I once had a friend who attempted to restore a motorcycle and just threw all of his bolts and nuts into a bucket. One of the bolts was from the engine. He tried putting what he thought was the right bolt back onto the engine, only to find that he had used too long of a bolt and cracked the cylinder head.
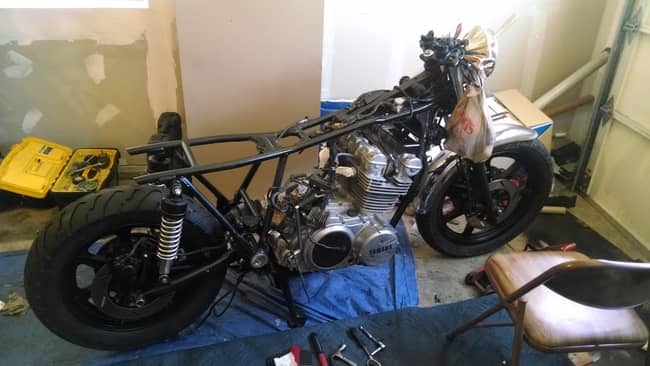
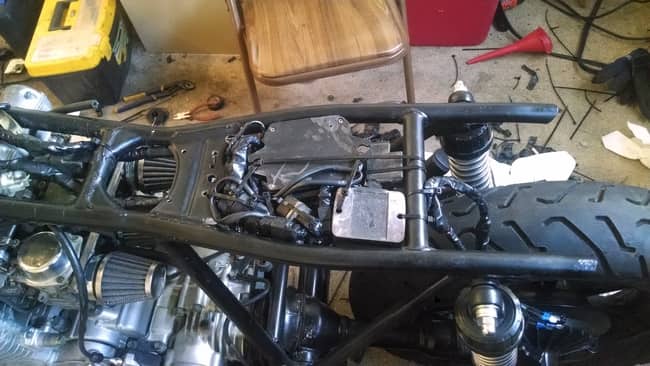
If you have a center stand, I would engage that and also have some sort of lift under which ever part of the motorcycle is heaviest to keep it balanced (like I have pictured above).
I would first start with taking off the tank to prevent inflicting any more damage to it even if you plan on repainting it. Next, remove any large gadgets such as windshields, side panels, etc. Next should be the seat, chain and tires, fenders, battery, carburetor, air box/pod filters, exhaust, lights, and instrument panel. I recommend keeping your wiring harness on.
Seat
The first thing you’ll want to focus on after stripping down your motorcycle to the frame is your seat. Now is also the time to make any frame alterations you need.
Very often I would shorten the rear hoop of the motorcycle frame. I use an angle grinder to cut it short. You can easily find rear hoop replacements on Amazon. You may need to modify the hoop a little, but that’s what it’s for. If you don’t have a welder yourself, take your motorcycle in to get the new hoop welded on.
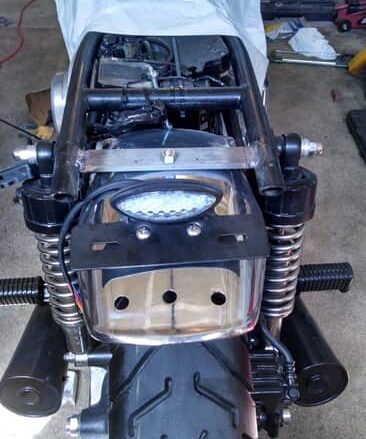
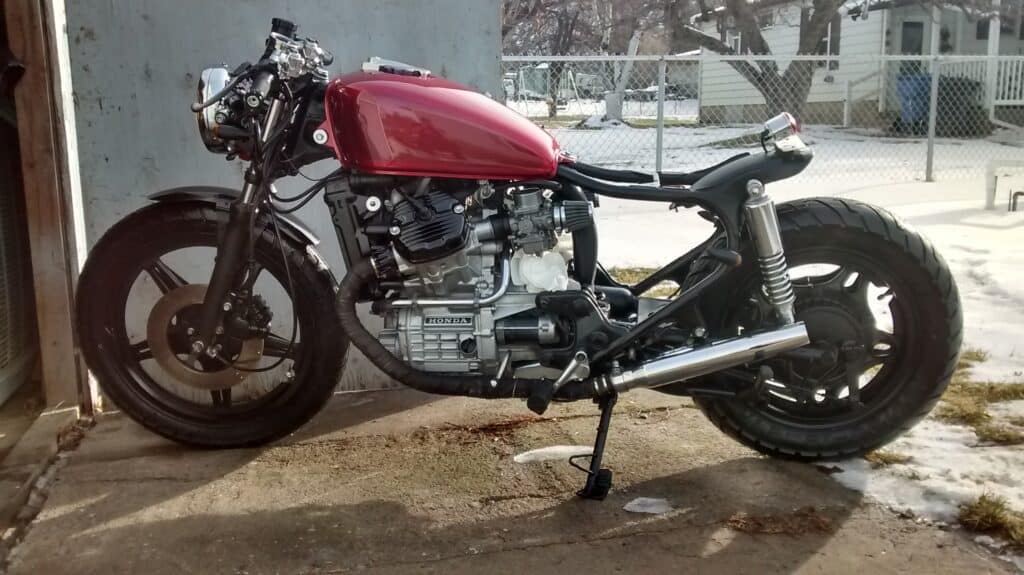
Some find that they want a two-seater cafe racer so they don’t bother modifying any part of the frame. That’s completely fine, too. With this particular motorcycle, I simply cut off the rear hoop, closed up the ends of the frame, and left it as is since the seat I was using was smaller. Sometimes I’ll use the rear fender as a raised platform to place the taillight on.
You can also find some nice motorcycle seat replacements on Amazon. Just make sure you get the right size suitable for your motorcycle, especially if you alter the rear hoop.
If you plan on having your seat custom made, now is the time to do it. In my experience, it usually takes several weeks or up to a month for seats to get finished by an upholsterer. If you have this sorted out first, you won’t risk any chance of sitting around waiting for it to get finished; instead, you can work on other parts of your motorcycle as your seat in being made.
Tank
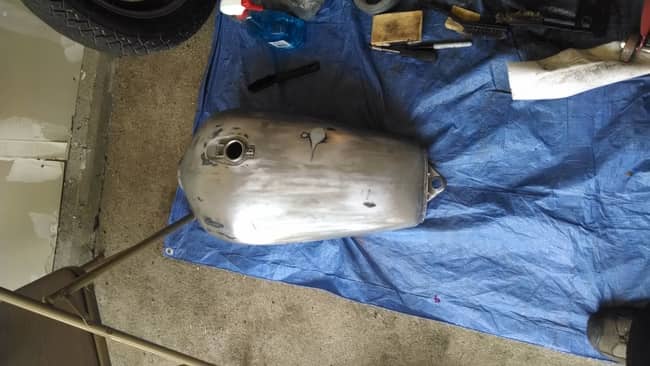
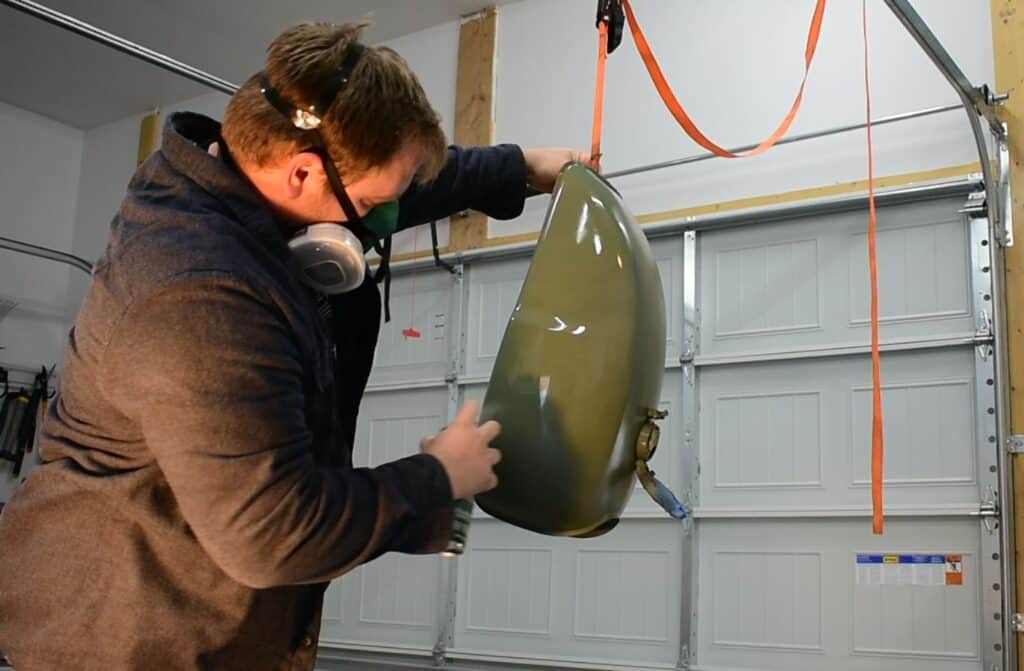
The next task you should focus on is your tank. If you’re a bit intimidated about repainting your tank, especially if it has some body work that needs to be done, you’re not alone. The good news is, painting a motorcycle tank is actually relatively simple, but quite time consuming.
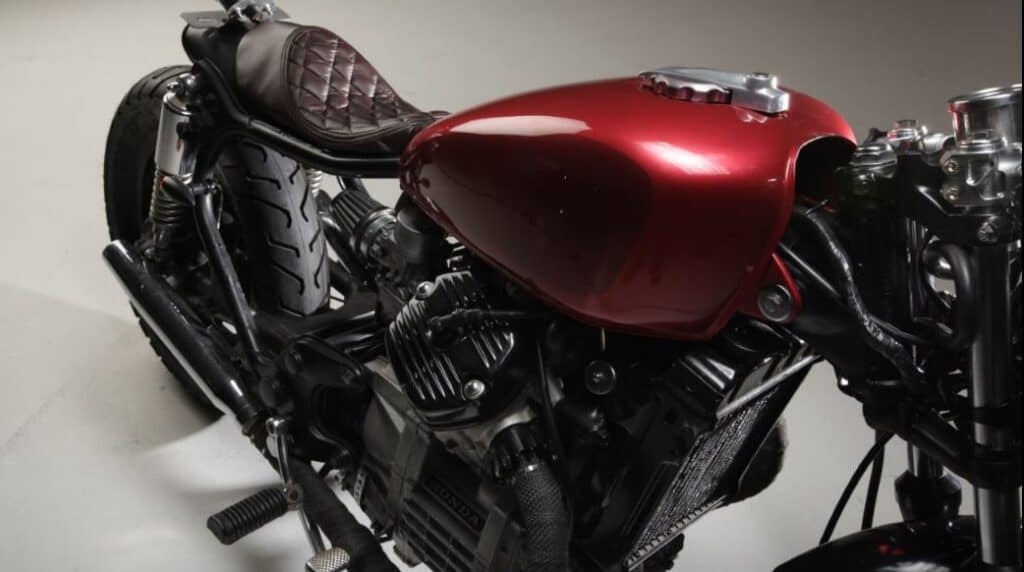
If you’re willing to be patient with the process, you will create a stunning tank that will for sure be a head-turner. The tank is usually the first thing people notice when they look at a motorcycle.
If you plan on changing the color of the tank, there’s no need to completely sand it down to metal (unless it’s obvious that some spots need to be sanded down to metal). Make sure to just roughly sand the whole tank and get it smooth.
Next you’ll need to fill in the dents with filler or bondo using a plastic scraper. Follow the directions according to the filler you use, you’ll probably need to wait a certain amount of time before you sand your filler. Make sure to sand your filler using a sanding block, this will prevent any grooves made by your fingers. Once filler has been placed, wash off the tank with a wet cloth then let it dry.
Next is priming. Do very light layers and plan on doing several layers of primer, about 4-5. Once that’s dry, assess any other dents you did not see and repeat using filler and primer.
Now is the time to wet sand with fine sand paper to make sure everything is smooth. Once you have deemed the tank to be smooth, you can start painting the tank the color you like. Again, do light layers, about 4-5. Once that’s dried and you like how it looks, spray your tank with a 2-part clear coat (NOT a single part clear coat). Do several layers, about 3-4.
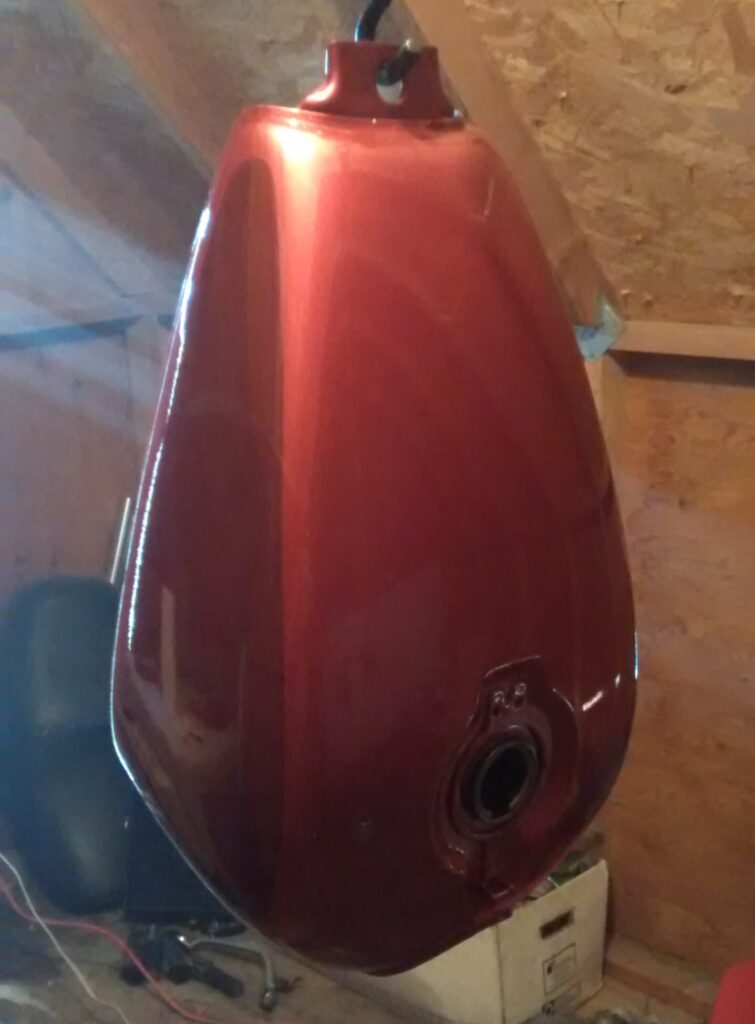
I recommend doing the tank at this point during your cafe racer build so it has time to cure during the time you spend on the rest of your motorcycle. See my full guide here about the paint I recommend for motorcycle gas tanks as well as how to properly paint the tank.
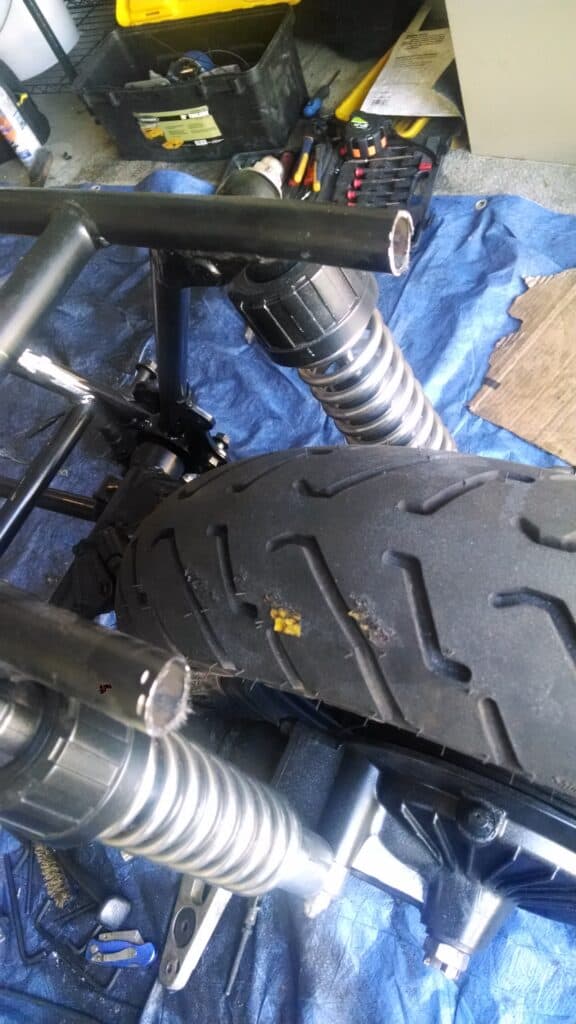
Mount New Tires
If you have new tires to mount, now is the time to do it. I always buy my tires online; some are skeptical about that, but I’ve never had a problem. You can find that best deals that way. Just make sure the site is credible and you purchase the right size (you can check the size on old tires). The tires I recommend for motorcycles can be found in my list of suggested motorcycle upgrades.
Take your tires in to a tire shop to have them mounted. I recommend doing this before you do any painting on the rims. The mounting machine scrapes all the way around the rim to take the old tire off and again to get the new tire on. Any paint that was done previously will be scratched and chipped.
Once your tires are mounted, go ahead and paint your rims if that’s what you are planning. Sometimes I keep mine chrome if I’m able to get it to shine with some water and steel wool. If they don’t look very good, painting them will give a fresh look.
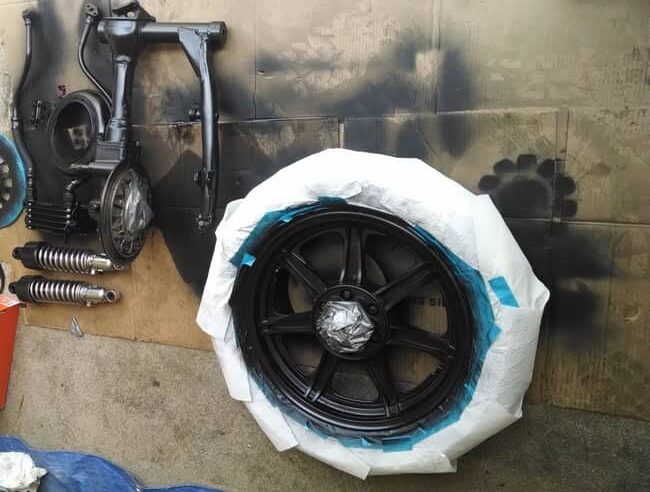
It’s easiest to put some paint tape on the tire and underneath the rim lip just a little. Then you can put some paper towels or paper around the tire themselves to prevent any over spray getting on them. Let the rims sit for a day or two so the paint can cure. Don’t place them back on to the motorcycle just yet.
Clean And Paint The Frame
When you have everything off your motorcycle except the engine and the wiring harness, this would be the time to pay attention to the frame.
I generally end up painting my motorcycle frames black because that’s how they came in stock, but you can honestly use whatever color you feel works best with your cafe racer. Be sure to plug any open holes with a washcloth such as air intake and exhaust ports.
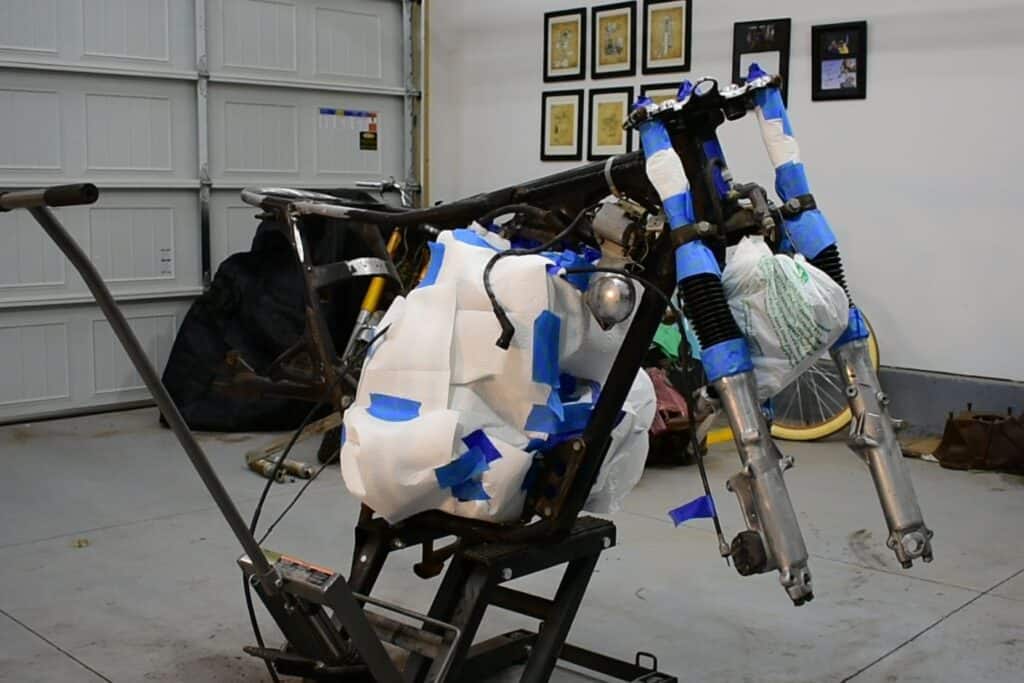
Preparation on the frame is the most important step you can take to make your frame look amazing. The first step you’ll need to take is covering everything on the motorcycle you don’t want to paint. Wrap paper towels and tape around your engine and wiring harness and make sure the tape is secure. Over spray has a tendency to get into places that you don’t want. Be completely thorough about this.
Take a wire brush and brush in all the cracks and crevices on the frame and brush out any parts that have thick, caked-on oil and dirt (usually the bottom).
Now begin using 150 grit sandpaper and do a rough sand-through on your frame. You don’t need to get to bare metal, just sand it enough to scuff it up so the new paint will stick. If there are any spots that have rust, then you will need to sand down those spots to bare metal before you paint to prevent the rust from spreading any further.
Do a good wipe-down of the frame with a wax and grease remover to remove dust and any other debris you may not have gotten.
Now you can prime your frame. I usually like to use the green self-etching primer if it’s down to bare metal. If it’s not, go ahead and use a regular sandable filler primer.
Once that’s dry, proceed with painting the frame with your desired color. It’s okay to use a high quality spray can rather than powder coating. Do several coats (4-5) to make sure you get everywhere. Let the paint cure for a day or two.
Once the frame paint has cured, now you can place the tires back on to the motorcycle and fasten the braking system. This is a really cool part about building a cafe racer because it begins to look like a motorcycle again, except it looks so much better than it did before. For more information about how to paint your motorcycle frame without removing the engine, see my guide by clicking here.
Clean/Rebuild Engine
If your motorcycle needs any engine repairs, now is the time to do it. If you need an engine rebuild, take it into a shop and have them do it for you. It’s annoying having to tow a motorcycle that isn’t running, but at least now you have the wheels on it to push it around.
There could be multiple issues that can happen with a motorcycle engine, but the most common engine problem I’ve run into is worn down piston rings (this is especially common for older motorcycles).
If your motorcycle ran before you started taking things apart but noticed it blew out a ton of smoke, that’s a sign that your piston rings need to be replaced. That means the oil is seeping by the rings and is getting ignited with the gas from the carburetor and is blowing out all that smoke.
If your motorcycle ran great before you took it apart, all you’ll need to do in this step is clean and shine up your engine. There are various ways to clean your engine and it all depends on the type of metal your engine is made of.
The most common type of metal motorcycle engines are made out of is cast-aluminum which looks and feels a little rough to the touch. You can clean it by using a scotch-brite pad and soapy water to wipe off the grease and grime that builds up on it. Unfortunately you cannot shine cast-aluminum engines.
The side engine covers, however, are usually made from block-aluminum which can very easily be shined up. This is where I spend most of my time cleaning on the engine. Older motorcycles will usually have scratched up side engine covers due to dropping the bike.
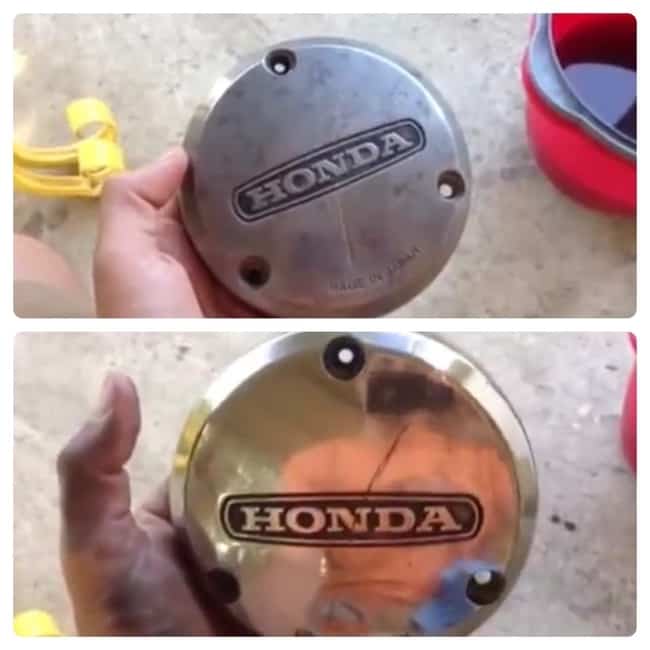
You can shine up the engine covers by sanding them with 60 grit, 150 grit, 220 grit, 400 grit, 600 grit, and 1000 grit. After sanding, use a metal polish to really give the side covers that brand-new look.
Clean/Rebuild Carbs
Before you take the carbs off your engine, take pictures of it so you know exactly how to place it back on. People often try to put them on incorrectly, even backwards. Obviously that won’t work.
Do not rebuild your carburetor unless you have a guide showing you how to do it; there are many small parts to a carburetor that are easy to lose and hard to remember where they go; carbs also often have screws that should not be turned in all the way, rather some need certain thread counts.
Check online for forums and repair guides specific to your motorcycle carburetor as each one is different. These will be able to give you a step-by-step guide on how to take apart your carburetor, what rebuilding kit to purchase, and how to put it back together.
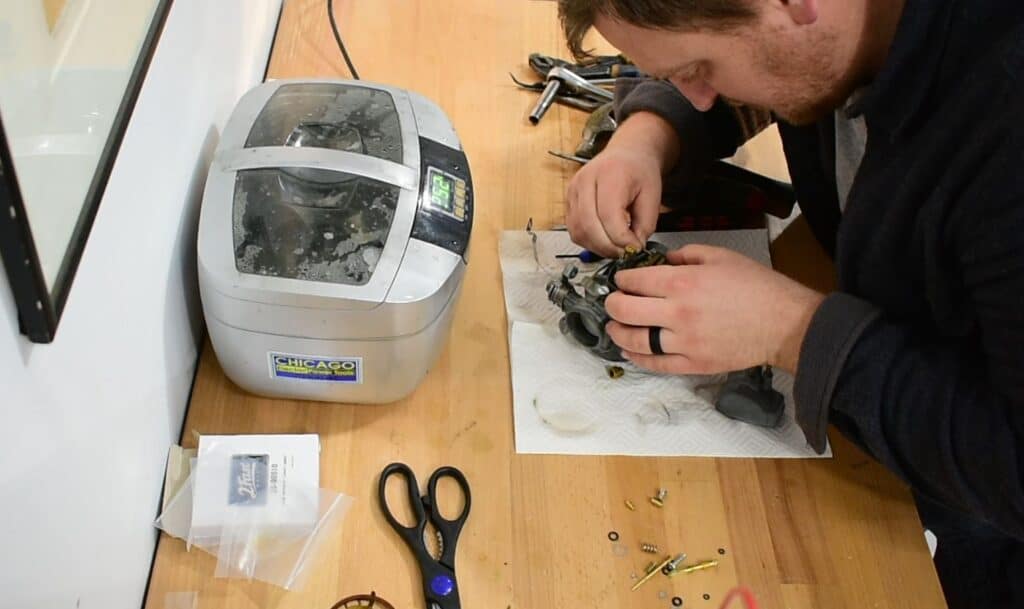
I recommend also using an ultrasonic cleaner to clean your carbs. These are generally inexpensive and can be found online, at home improvement stores, or auto stores. You can place all the carburetor parts in an ultrasonic cleaner once it’s all taken apart; the cleaner will break apart all the gelled up gas.
If you prefer to clean your carbs without removing it, you can learn how to do it by seeing my step-by-step guide here.
Install Lights, Instrument Panel, Handlebars, and Fenders
Now is the time to install your lights, instrument panel, handlebars, and fenders. Don’t worry about hooking everything up to the wiring harness just yet. Just place the lights where you want them to be and label the wires attached with some tape so they’re easier to identify in the future when you do hook them up to the wiring harness.
If you end up buying a new speedometer or tachometer, be careful of buying ones that state they’re “universal.” There really is no such thing as a “universal” tachometer or speedometer.
You can identify the right tachometer and speedometer on your motorcycle by looking in your owner’s manual or looking on the back of the old ones which will have a ratio such as “4:1” or “600:1,” etc.
These numbers are the gear ratios inside these instruments. For example, a “4:1” ratio means for every one rotation of the wheel, the gear inside the instrument will rotate four times. A universal or different ratio speedometer and/or tachometer installed will give you false readings.
Install Battery And Wiring Harness
Now that you have all of your electric components in place, hook them up to the sources of power.
Get a test light so you can use it to know when you have power, where you should have power, and print off a wiring diagram as well as watch some videos on how to track down some electrical problems.
This is often the most frustrating part about rebuilding a motorcycle. The electrical components can get a little confusing even for those who are experienced. Have a friend or co-worker come over that knows a little bit about wiring and electricity to help you out while you hook up your electrical components.
Once you have everything hooked up properly, try to hide as much of the wiring as possible. I usually use some zip ties and tie them to the frame underneath the seat where you can’t see it. That’ll give your cafe racer the sought-after wireless look.
Exhaust
Exhaust is important to pay attention to because it can really make or break a cafe racer.
Sometimes I use the same exhaust pipes that were already on the motorcycle, or I order some new, smaller ones to give a cleaner look to the exhaust system.
You’ll need to remove the exhaust pipes and examine them to make sure there aren’t any holes in them. Exhaust pipes are susceptible to holes because of the heat running through them and are more prone to rust with them being on the bottom of the motorcycle. Make any needed repairs to them.
Exhaust pipes tend to be a bit ugly due to the heat that’s constantly going through them, so I usually use some exhaust wrap to cover any potential cosmetic issues.
Install Tank
Now that your tank has cured for a while, you can place it on your motorcycle. This is a simple step, however, make sure you are extremely careful as you do so. There’s nothing more frustrating than installing your freshly painted motorcycle tank and scratching it while you install it.
Screw in the bolts necessary to keep the tank in place. Next, connect the fuel line to the fuel valve on the tank. Now you can pour some gas into the tank. I recommend not filling up your tank completely in case you need to remove it again for whatever reason. Make sure your petcock is turned to “on” if you have one.
Caution! Before you try starting your motorcycle, slowly turn your handle bars from side to side and make sure they do not bump into your tank. If you notice it’s too close for comfort, adjust your handlebars so they won’t collide with your tank while you’re making future turns.
Now is the moment of truth: starting up your cafe racer! It will probably take a few tries to get your motorcycle started because it’s trying to work out some of the dust that may have gotten inside while you worked.
Install Seat/Quality Check
Your seat should be done by now if you had it professionally done by an upholsterer. Before you install it, do a quality check on your cafe racer and make sure everything looks the way you want it.
During this step, I’ll usually find a small spot on the frame I missed or a wire sticking out that I don’t like. Take the appropriate steps to clean up everything and make it look the way you want it to.
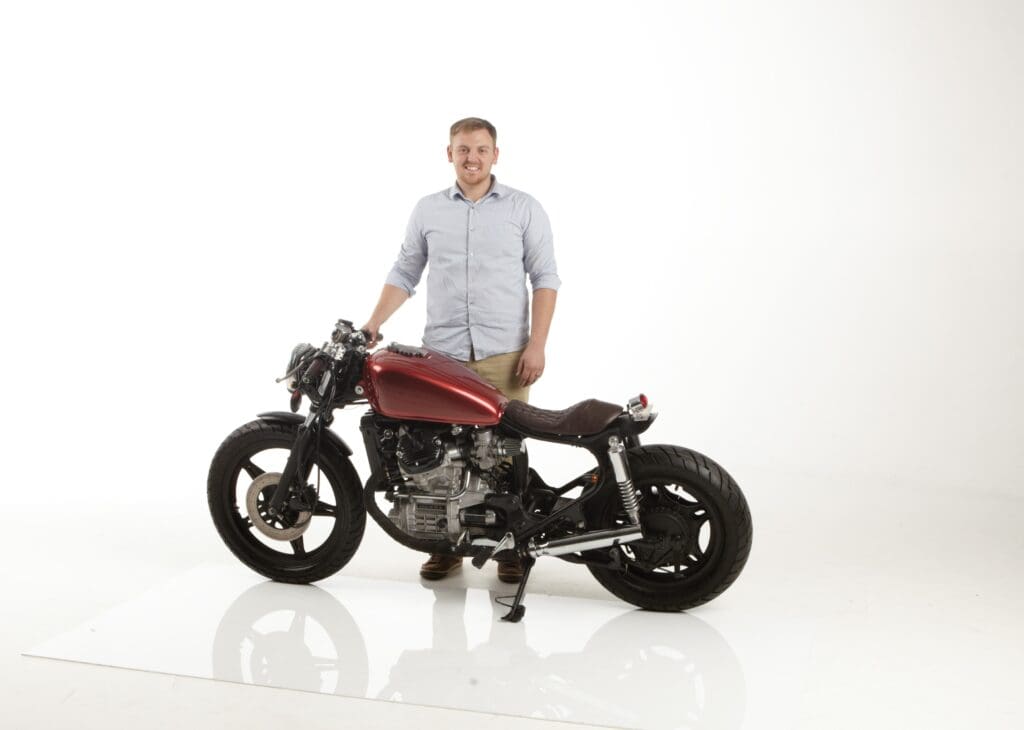
Now you can add the final touch: your seat. And voila! You just rebuilt your own stunning cafe racer!
Conclusion
One of the coolest things about building a cafe racer is that not only is the finished product amazing, but they’re actually pretty simple to build. I had zero experience when I started rebuilding cafe racers. But a busy engineering college student still had the time and ability to not only build one, but later build 17 more! If I can do it, you certainly can too. Please feel free to contact us if you have any questions!