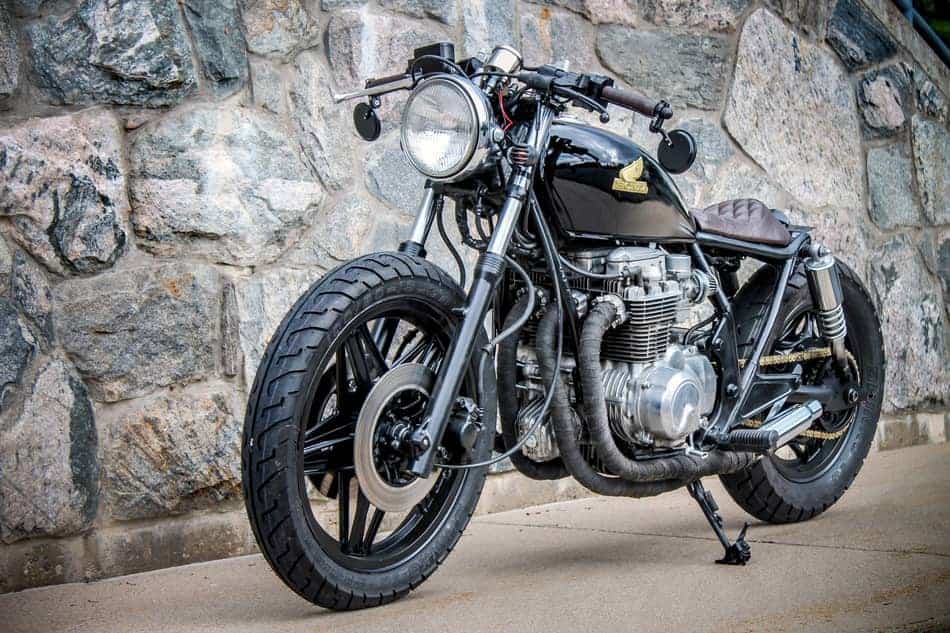
Cafe racer motorcycles have always caught the interest of many motorcyclists throughout the years. A few years ago, they seem to have had a peaked interest from more and more people and the sightings of cafe racers riding on the road are becoming more common.
If you’re in the market to get yourself, or make yourself, a cafe racer but have a strict budget, you’ve come to the right place. I restored several motorcycles and turned them into cafe racers while I was going to college, so money was extremely tight. Here are some helpful tips on how to build a cafe racer on a budget that I learned while restoring bikes.
Buy A Project That’s Running
Normally I suggest someone who is interested in restoring a motorcycle to buy a project that doesn’t start. However, if you’re on a budget, I recommend you start off with something that’s already decently running.
Older motorcycles make an excellent candidate as cafe racer builds. The easiest motorcycles to restore are generally Japanese brand motorcycles made between the late 60’s to late 80’s. They are easy to find, easy to work on, and cost very little compared to other motorcycles. Click here to see my complete list of motorcycles I recommend to turn into cafe racers.
When you buy an older motorcycle that doesn’t run (but did several months prior), the usual culprit is the carburetor. However, if you’re working on a budget, it’s best to simply buy something that you know works well just in case the problem is outside of a carb issue. That last thing you need for a tight wallet is a new engine rebuild.
Sure, you may find a better deal on something that isn’t running which can make it tempting to buy, but it’s hard to know what the issue is until you actually get to pull it apart which you can’t do until you buy it. However, if you’re mechanically inclined and can easily make fixes yourself, perhaps this rule doesn’t apply to you.
Make A Plan Before Beginning
Once you have the motorcycle you know you’re going to convert to a cafe racer, take some time to thoroughly look it through and see what it needs and what you want to do with it. It often helps me to look at pictures online for inspiration of what I want to make. If possible, print out a picture of what you want and hang it around your work space.
Once you have an idea of what you want to make the motorcycle look like, make a list of what you need to do to make it look that way. Obviously you won’t be able to jot every single thing the motorcycle needs since you’ll likely stumble upon surprises. Once you get a good idea of what the bike needs, price everything out to see how much it’ll cost. Count on a few extra hundred dollars for surprises.
If the total comes out to something you feel you can’t afford, make some changes to your plans that’s more friendly to what you can afford. I would recommend dismissing small customizations that are expensive that no one would notice anyway (such as specific brands of tires or grips, etc.).
Sell Old Parts
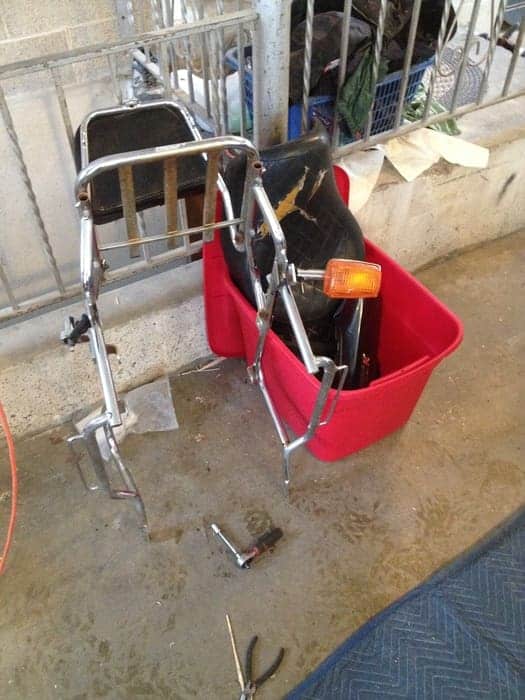
One of the basic components to a cafe racer is it’s minimalist look. If you’re buying an older motorcycle to convert into a cafe racer, you’ll likely have a lot of bulky, unwanted parts you’ll be taking off.
Don’t discount the value of these parts you shed. They can be quite valuable to you so don’t throw them out just yet. Before considering recycling these parts, look online to see if any of them are worth anything. This is an excellent way to help fund your build and you’d be surprised at how many of the parts you don’t end up using could sell for a decent amount of profit.
With most of my builds I’m able to sell about $100-$200 worth of parts. That may not seem like a whole lot, but if you’re on a budget this amount can go a long way. This is especially true if you’re good at finding deals and able to get other parts at a discounted price.
Use Salvage Yards
During your cafe racer restoration, consider browsing through a local salvage yard. These are also known as junkyards or wrecking yards. This is a place where decommissioned and wrecked cars and motorcycles are brought to and parked.
Places like this allow the public to browse and pick apart the vehicles that are parked there. You’ll still need to pay for the parts you take home, but the price of these are usually pennies compared to what you would pay elsewhere. Some salvage yards even have sales, so stay up to date and check their website or social media accounts to see what they have planned.
If you do consider using a salvage yard to buy parts that your cafe racer needs, make sure to take measurements of the bike beforehand to ensure you get the right size if you do find the specific part you need.
If anything, salvage and junkyards are a great place to find scrap metal. Any time I restore a motorcycle, I end up getting the seat custom made which requires I make a seat pan. Scrap metal from a salvage yard would be the perfect candidate to get scrap metal for projects like that.
Use Local Classifieds
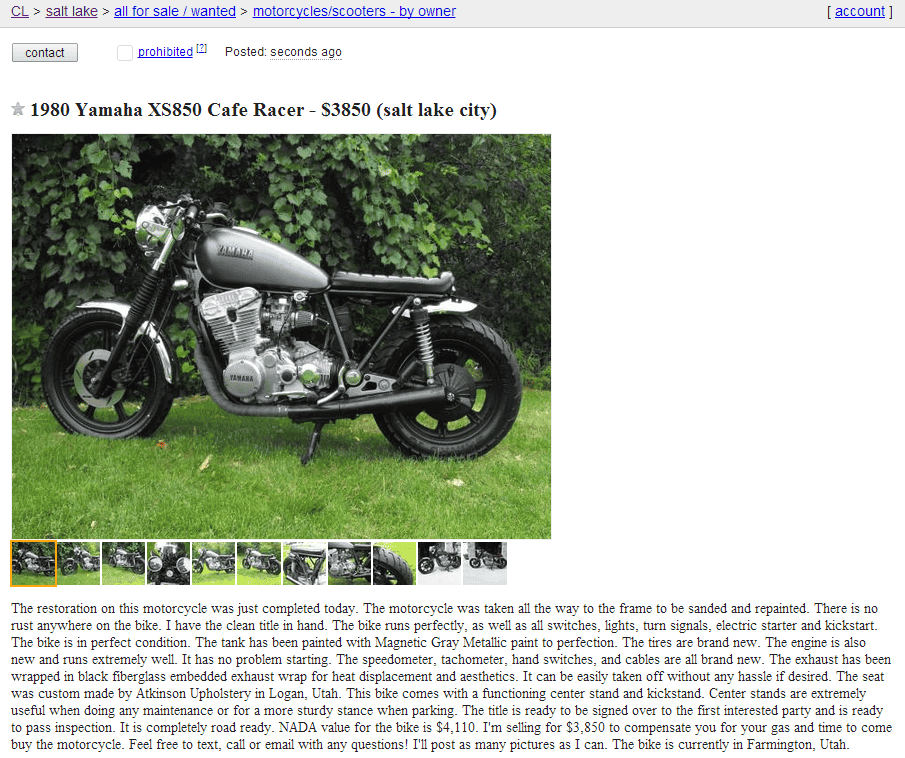
Everything you buy for your cafe racer doesn’t necessarily need to be brand new. In fact, I recommend you get anything used as much as possible. Used products will almost always be much cheaper than brand new (though do your research first before purchasing).
One of the biggest resources I use when restoring a motorcycle is local classifieds. Classifieds can be found in local newspapers or magazines but are most commonly seen on online platforms. Craigslist is a perfect place to start. And you’ll be pleasantly surprised at how someone randomly has a specific part you may need.
For example, when I was rebuilding a 1980 Yamaha XS850, I found out the engine was blown (when I thought it was just a carb issue). As luck would have it, someone on the local classifieds was selling the exact engine I needed as a replacement and I was able to buy it for $200. It was a pretty specific engine which made it the perfect exchange. The engine ran great and I was able to complete that cafe racer build.
Paint The Tank Yourself
I’m not really sure why, but there’s a lot of websites out there that discourage you from repainting the gas tank yourself. I’m living proof that painting a motorcycle gas tank yourself is completely manageable and also completely affordable.
If you already like the paint job on the tank and it doesn’t need any repairs, you can disregard this tip. But if you do want a new paint job, know that you can do it yourself with a few simple tools.
You’ll basically need some sand paper, Bondo, a Bondo scraper, primer, paint, and clear coat. Most people assume that you’ll need something like a high volume low pressure paint sprayer, but a task like this is actually completely doable with an aerosol can.
Specifically, I recommend Dupli-Color aerosol spray paint. I’ve used this many times myself and it has yielded excellent results. See my other article here to learn more about the kind of paint I use on motorcycle gas tanks as well as how to paint a tank.
Paint The Frame Without Removing The Engine
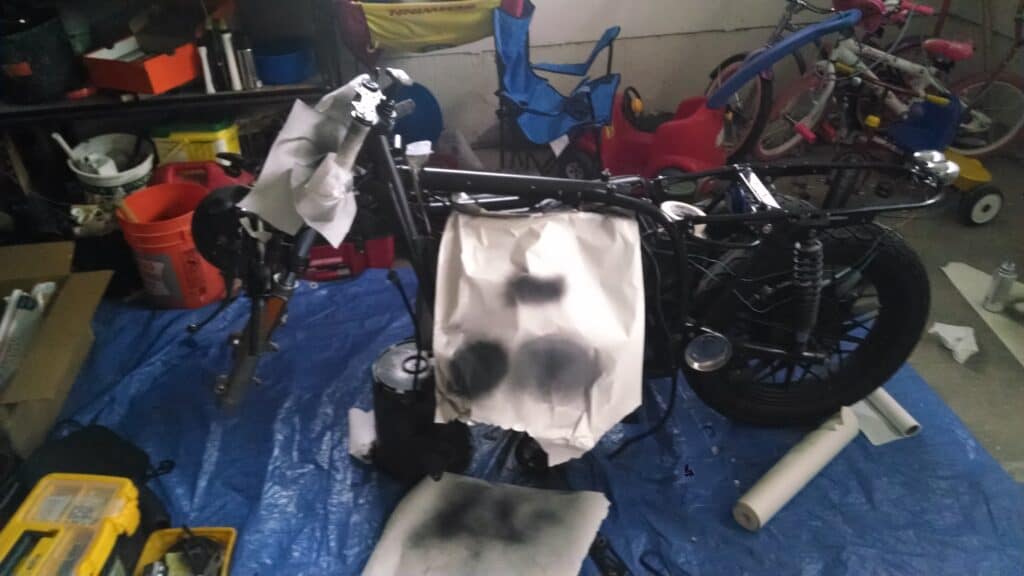
Unless the frame on your motorcycle is in perfect condition, you’ll probably need to give it a fresh new paint job. This often sends a sense of dread through most people because they assume they need to take everything off the frame, including the engine, to complete this task.
The good news is that you actually don’t need to remove the engine. The first few restorations I did included removing the engine because I thought you needed to. Then I started experimenting and found that you can get the same results without having to take the engine off. This not only saves time, but it also saves money.
To paint the frame without removing the engine, you’ll need to make sure the engine is completely covered so no over spray will get on it. Again, you don’t need to use a high volume low pressure paint sprayer to get the frame to look good. And again, Dupli-Color aerosol paint has worked wonders on my cafe racer builds.
Aerosol spray for a frame is an excellent way to save money when you’re on a budget. And not having to remove the engine means you save money on tools, hardware, and prevent yourself from making expensive mistakes while in the process. To learn more about how to paint a motorcycle frame without removing the engine, see my other article by clicking here.
Make Changes That Don’t Require Heavy Tools
I had touched up on this a little bit in a previous tip, but I’d like to go into more depth about not doing custom work or changes that require heavy tools and machinery. It’s completely possible to build a cafe racer without having to make dramatic changes to the bike’s structure.
It’s so easy to get caught up in making those custom changes that will really make the motorcycle look fantastic. But if you’re on a budget, those big changes just may not be possible yet. Perhaps you can save up to do it in the future.
Such changes you’ll probably want to avoid include creating custom framework, custom handlebars, custom seat frames, or anything that has to do with welding. I was able to get away without needing any of these commodities on a lot of my cafe racer builds and they turned out amazing. I was able to get away with just using a set of basic tools. Click here to see the list of tools I used on my cafe racer builds that I recommend.
Take A Lot Of Pictures/Videos
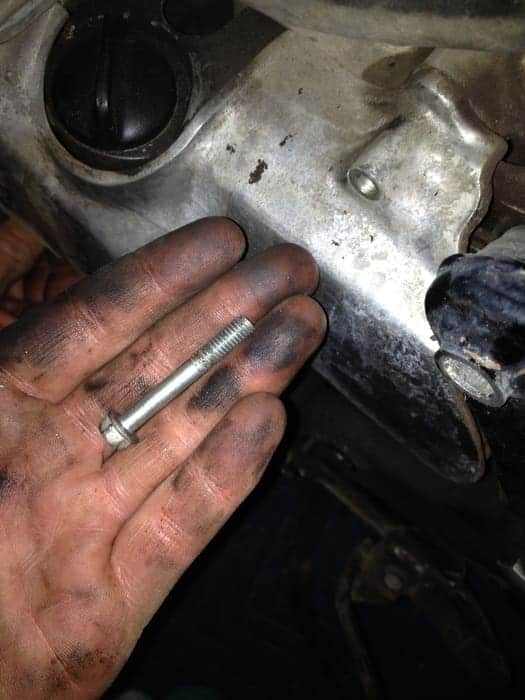
This is one tip that I cannot stress enough. Taking a lot of pictures or videos of parts that you are disassembling on your cafe racer will save you so much frustration, time, and money in the future.
It may seem easy enough to remember where everything will go when you’re taking it apart, but I assure you that you won’t remember when it comes time to put everything back together. It’ll likely take you at least a few weeks or months to get everything done that you need to be ready to put everything back and by that time your recollection won’t be as good.
Not taking good pictures and/or videos will cause a lot of discouragement in the future. Let me give you an example. I had a friend who attempted to rebuild a motorcycle and turn it into a cafe racer. He took all the parts off without taking pictures or videos and tossed all the hardware into a bucket.
When he tried to reassemble everything, he used the wrong screw in the engine and ended up cracking it. He got so discouraged about the project that he gave up and sold the whole motorcycle for about $200. He lost a lot of money and confidence by not following this rule.
Some Cheap Parts Are Okay To Use
A piece of advice I always give to those who are ambitious to build a cafe racer is to not always assume that expensive parts are always better. Just because something is priced higher doesn’t necessarily mean it’s the best option for you and that you should buy it.
Obviously, the very cheapest parts might not give you the best results either. But a lot of less expensive parts for a motorcycle have also proven to work just as well as the expensive parts. I’ve never been one to get the most expensive replacements out there and it has worked out just fine for me.
Take some time to do some research before buying a specific product for your cafe racer. Try to find reviews and see what other people say about it. You may be surprised at how good a product can be that’s well within your budget range. Click here to see my list of budget friendly upgrades that are perfect for a cafe racer build.
Keep Headers With A Stylish Covering
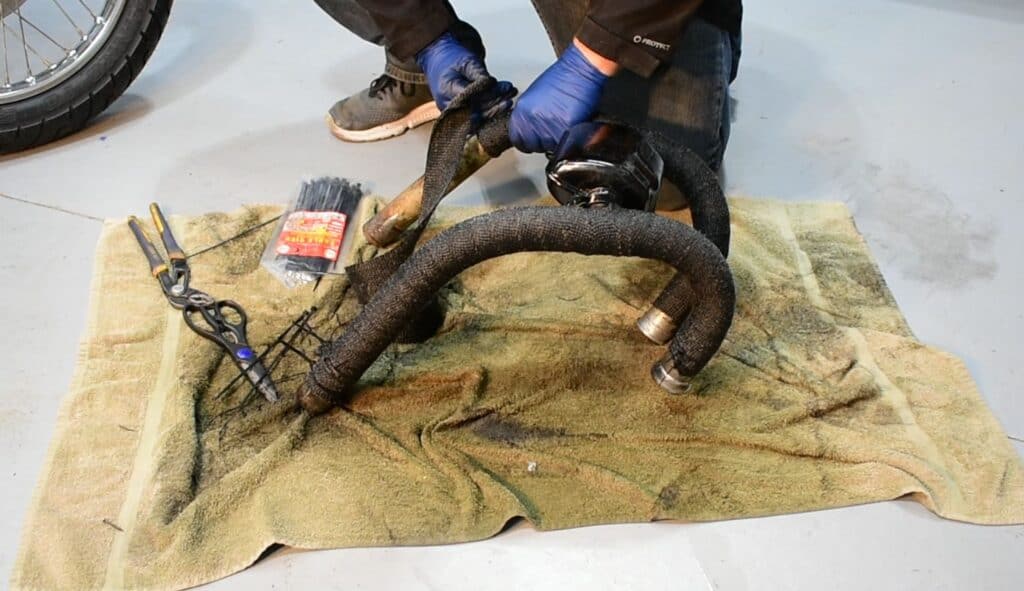
One of the biggest misconceptions people have about transforming a motorcycle into a cafe racer is that they need to get brand new headers. Over time, exhaust pipes on a motorcycle can often turn yellow or blue and just kind of look junky because of age.
Headers for a motorcycle can be an expensive replacement and my recommendation is to salvage the ones you already have unless they are completely rusty or unusable. There are plenty of things you can do with the headers to make them look like they belong on your cafe racer build.
My first suggestion would be to paint them. This works best if the exhaust pipes have a smooth surface that paint would look good on. Paint would do a fine job at covering any blemishes the pipes may have formed over the years. Be sure to use a high-heat paint that can withstand the extreme temperatures going through the pipes.
The second recommendation I have is using exhaust wrap. This is something I’ve done a lot on my cafe racer builds and I love the look of it. You’ve probably noticed a lot of other pictures of cafe racers that have exhaust wrap, too. This is something that can easily be done in an afternoon by yourself in the comfort of your garage.
Alter Fenders Yourself
A lot of people choose to opt out of using fenders altogether on their cafe racer builds since it can enhance the look. But a lot of states in the U.S. require motorcycles have to both a front and rear fender in order for it to legally be ridden on public roads.
Instead of getting new fenders altogether, try altering them yourself to make them smaller but still legal. In my list of recommended tools (click here to see it), I recommended that those who are restoring a motorcycle have an angle grinder. This is the perfect tool to use if you want to shorten the fenders of a motorcycle. These are dangerous tools, however, and should be used with caution and experience.
It’s possible to do this on the front fender, but you’ll need to make the cut extremely accurate since the whole thing is exposed. I mostly recommend this process for the rear fender since you can cut off the desired amount on the side that’s hidden underneath the seat. You’ll just need to make a few new holes in it so it fastens to the frame in it’s new position.
Polishing Is Easy
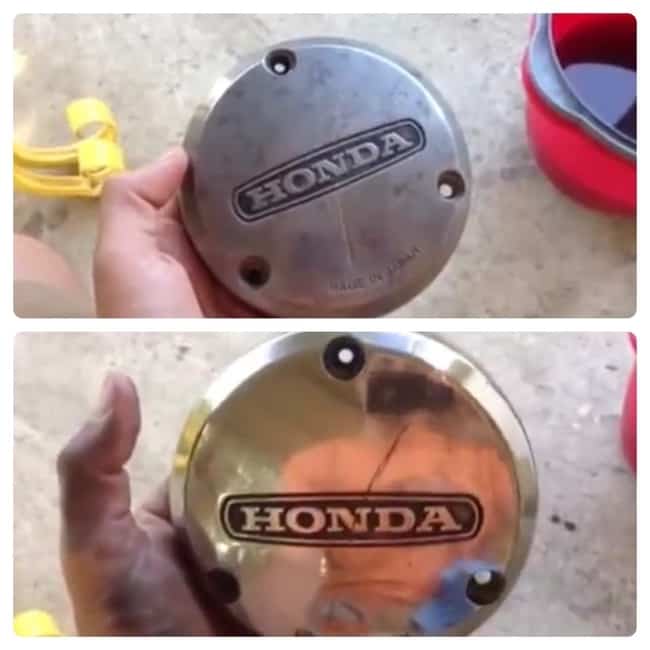
Before resorting to getting new engine covers, think about the possibility of polishing them. New engine covers can look amazing and save you a lot of work, but if you’re on a tight budget then polishing the covers yourself can give you almost the same results if you’re willing to put the time in.
Older motorcycles will especially require the side engine covers to be polished. Over time, the heat can tarnish them and make them look dirty. But this is usually something that some sanding and polish can’t take care of.
However, if there are deep scratches or chips on the engine side covers, you may need to get replacement ones since those are kind of an eye sore. Again, don’t immediately resort to buying brand new shiny ones. Buy ones that are in good shape but still tarnished. These are much, much cheaper and can be polished by you with a little bit of time and elbow grease.
Use Coupon Codes
I bought a lot of replacement parts for my cafe racer builds online. It’s an excellent platform to use and will give you a slew of good prices and choices to pick from.
Any time you are buying something online, especially if it’s from a brand name store, check to see if there are any coupon codes you can use. About half the time you should be able to find something that can save you a little bit of money.
You can do this by simply doing a google search. For example, if I was buying a specific type of tires, I would google the tire name and add “coupon code” at the end of it. You may find coupon codes that are amazing such as “20% off” or “free shipping.” Others may not be as good and only saves you a few dollars, but hey, that’s a few extra dollars that stays in your pocket.
Make Your Own Battery Box

One thing I love about some cafe racers is the mystery of where the battery is. A lot of cafe racer builders try to make the side of their bike see-through, hence their reputation of being so minimalist.
A battery can really be placed anywhere on a motorcycle as long as the wiring accommodates it’s position and it continues to be safe for the rider. Getting creative with where you place the battery can be pretty fun, but figuring out how to keep it there in a safe manner might be a different story.
In this scenerio, I recommend you build your own battery box. There are plenty of fashionable ones out there you can buy, but those tend to be a little expensive. I also find it pointless purchasing a cool battery box because your objective is to hide the battery which will include hiding the battery box. No one’s going to see the expensive battery box anyway. For more information about how to hide a motorcycle battery, see my other article here.
You can easily custom make a battery box using some sheet metal and some metal plumber’s tape. This way you can make the exact shape you need for your battery and really make it look any way you want it to.
Conclusion
Embarking on a cafe racer build on a budget is not only feasible, but it can also be an incredibly rewarding experience for motorcycle enthusiasts. By following the 15 tips outlined in this article, riders can navigate the process with confidence, knowing that they can achieve their desired results without breaking the bank.
Having done this process dozens of times myself, I can attest that these tips work. If you have any questions, or if you have further suggestions, please feel free to comment to reach out to me personally!

